Catdom Color Hole Level 77 Solution Walkthrough & Answer
How to solve Catdom Color Hole level 77? Get instant solution & answer for Catdom Color Hole level 77
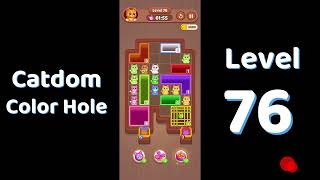
Catdom Color Hole Level 77 Overview
Alright, Level 77, fellow cat-herders! This one is a delightful dance of precision and timing, challenging you to scoop up a scattered collection of blocks. You'll start with a massive pile of small blocks, but the real test comes with the heavier dark blue ones that unlock the path to victory.
Step-by-Step Guide for Catdom Color Hole Level 77
- Initial Scoop:
First up, those easy-peasy light blue blocks to your immediate right. Glide your color hole over to the right and smoothly absorb that first big cluster. This is your warm-up, so make it satisfying!
- The Lone Wanderer:
Now, let's grab that first larger, dark blue block chilling slightly to the left. This requires a bit of finesse. Position your hole directly under it, letting it drop straight in. Don't rush; we don't want it bouncing off into the abyss!
- The Heavy Hitter & Chain Reaction:
Time for the main event! Head all the way to the left side of the screen. You'll spot another chunky dark blue block with a few sneaky light blue ones trapped beneath it on ledges. Your mission is to precisely position your hole under this big dark blue block. This is the clutch move: once it drops, its weight will knock those smaller blocks free!
- The Cleanup Crew:
Immediately after the heavy dark blue block tumbles in, swiftly move your hole back to the right, sweeping under where those light blue blocks were trapped. They'll be falling now, so be quick to catch them all. This is where a perfect clear feels so good!
Difficulty Analysis
Level 77 isn't about speed, it's about surgical precision, especially in the latter half. While the initial cluster is a breeze, the lone dark blue blocks are classic 'newbie traps' if you're not careful. The real headache, and ultimate satisfaction, comes from that far-left chain reaction. Misjudge the heavy block's drop, and those last few light blue blocks can just vanish off-screen or remain stubbornly perched, forcing a frustrating restart. It’s a good test of your mastery over the game's physics!
Key Challenges
- Precise Placement:
Getting your hole in the exact spot for those single dark blue blocks is key. One pixel off, and physics goes rogue, sending your valuable blocks scattering!
- The Chain Reaction Trigger:
The biggest challenge is flawlessly executing the drop of the far-left dark blue block to dislodge the smaller light blue ones. It’s all about hitting that sweet spot to ensure they fall into your range, not out of bounds.
- Timing the Cleanup:
After the big block falls, quickly repositioning to catch the cascade of smaller blocks needs swift reflexes. Hesitate too long, and those last few stragglers are gone forever!
Level Features
This level cleverly uses varied block sizes and strategic ledge placements to create a domino-effect challenge. The interplay between the heavy dark blue blocks and the lighter trapped ones is the star here, demanding more than just simple collection. It’s a beautifully designed 'physics puzzle' moment that feels incredibly rewarding when you nail it.